How to format Amazon KDP books can be daunting, but it doesn’t have to be! In this friendly guide, we’ll walk you through the key steps. They will ensure your book meets KDP’s requirements. Then, you can focus on your creative process and start earning from your writing.
Table of Contents
How to Format Amazon KDP Books
Understanding the KDP Upload Process
Uploading your book to KDP can seem overwhelming. However, breaking it down into steps can make the process easier. Start by preparing your files, including your interior manuscript and cover file.
Uploading Your Manuscript
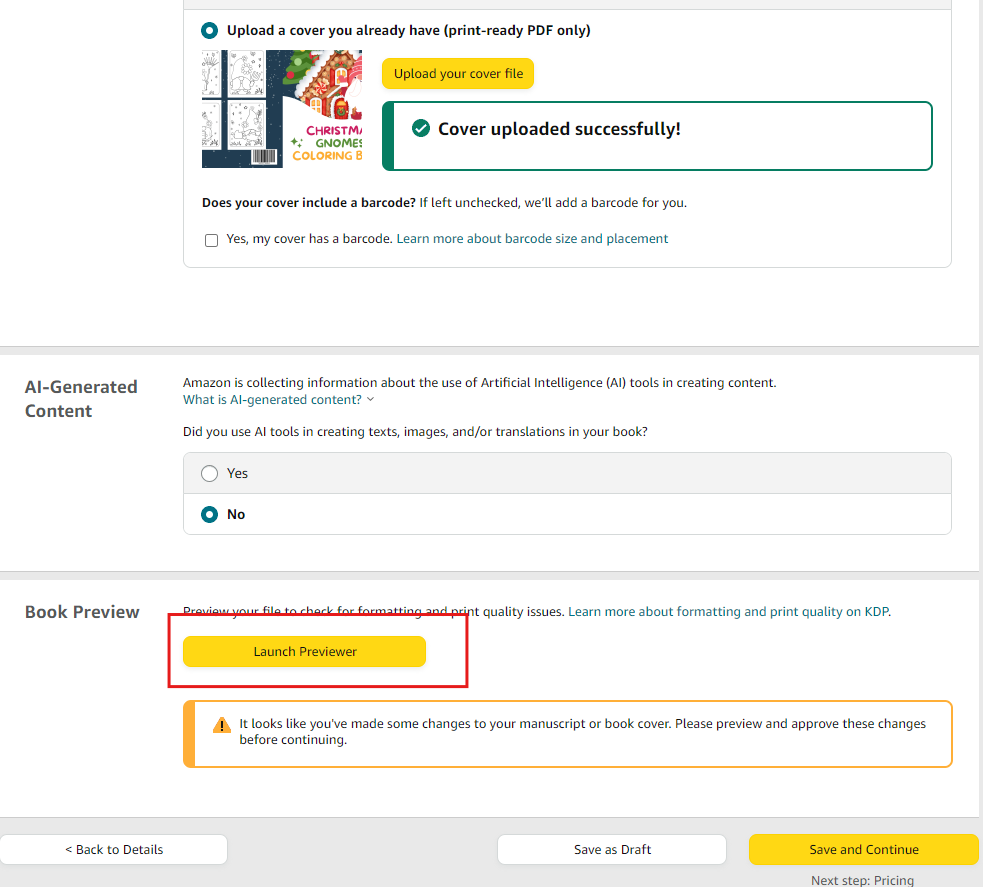
Once you have your files ready, log into your KDP account. Here, you will upload your interior manuscript and cover file. After uploading, click Launch Previewer. See how your book will appear when printed.
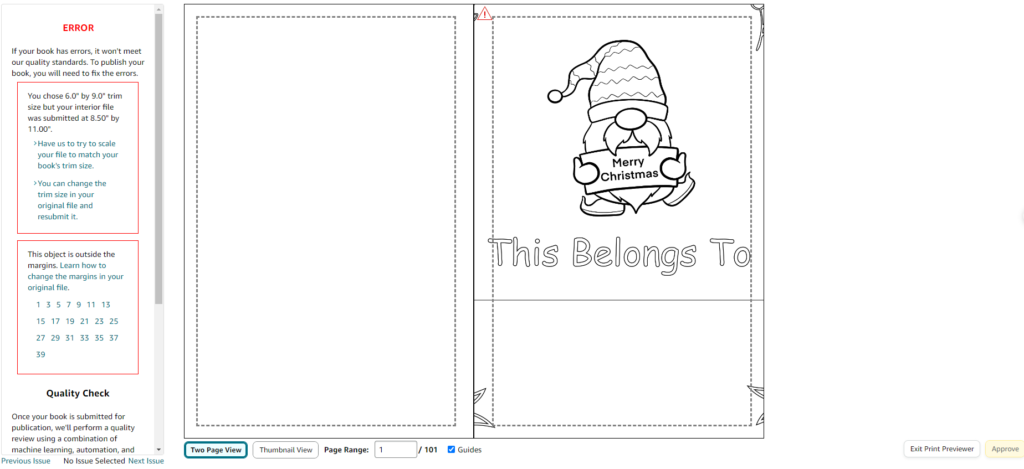
It’s common to face some errors in the previewer. If you see a red warning triangle, hover over it to understand the specific issue. This feature helps you identify errors related to formatting, margins, or other problems.
Interpreting Errors
Errors can arise from various issues. This is true whether you are publishing fiction, non-fiction, or low-content books. Understanding the error messages is crucial for troubleshooting. Take your time to read the messages and make necessary adjustments to your files.
Correct these errors before finalizing your upload to save time and potential headaches. This ensures your book is ready for publication and avoids delays.
Choosing Your Book Size
Choosing the right size for your book is essential for its success. The size you select will influence both the design and production costs.
Common Book Sizes
The most popular size for many books is 6 by 9 inches. This size works well for a variety of genres and is widely accepted in the market.
- 6 x 9 inches – Standard for most books
- 8.5 x 11 inches – Great for larger formats
- 5 x 8 inches – Ideal for pocket-sized books
Considerations for Size Selection
When deciding on a book size, consider your target audience and content type. Larger books, such as coloring books or non-fiction guides, often benefit from an 8.5 by 11 inch format. However, smaller sizes may lead to more pages. This can increase costs.
Ultimately, the right size for your book will depend on your specific needs and goals. Choosing wisely will help you format KDP self-published books well. It will help you reach your audience better.
Creating Your Book Cover
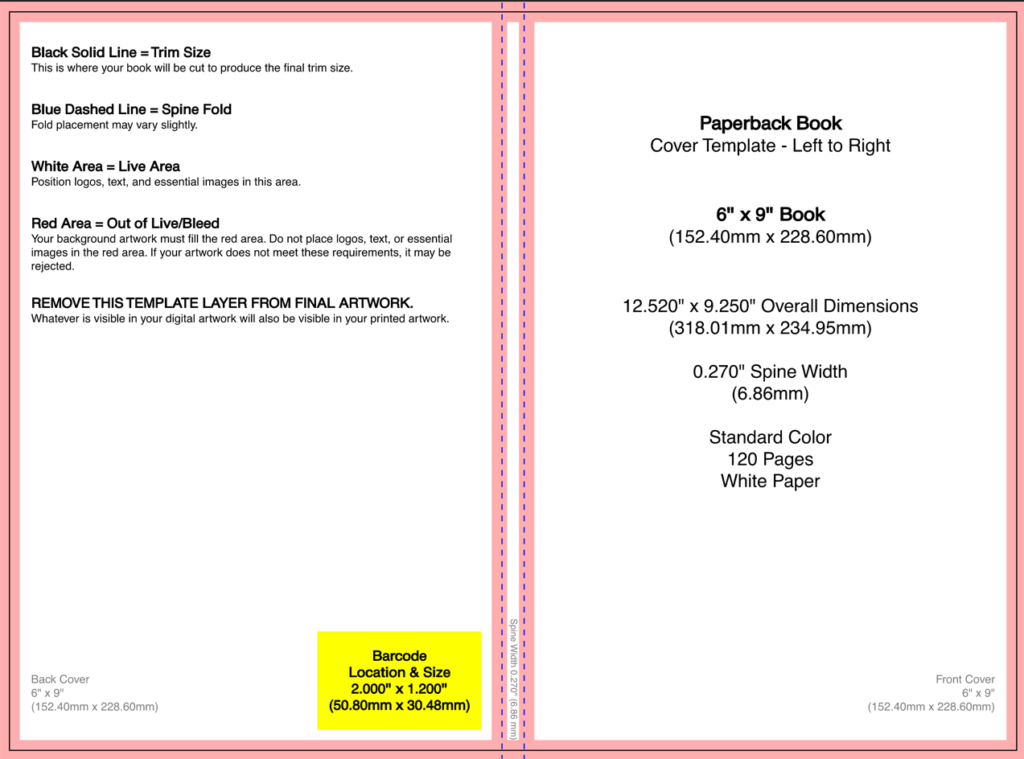
Creating an engaging book cover is essential for attracting readers. Start by determining the correct dimensions for your cover, including the front cover, back cover, and spine. For a 6 by 9-inch book, the overall cover size will be larger to accommodate these elements.
Understanding Cover Size and Bleed
It’s essential to account for bleed, which is the area that extends beyond the trim size. This ensures that there are no white edges once the book is trimmed. To get the exact dimensions for your cover, you can use an online template generator.
I recommend using KDP Cover Calculator to generate your cover template. Simply input your book’s dimensions and page count. For example, if your book has 120 pages, enter that number along with the 6 by 9 inches size. You’ll receive a template that shows you the precise layout size needed for your cover.
Using KDP Cover Creator
The KDP Cover Creator is a handy tool that allows you to design your cover directly within the KDP platform. While it is convenient, it does have limitations compared to professional design software.
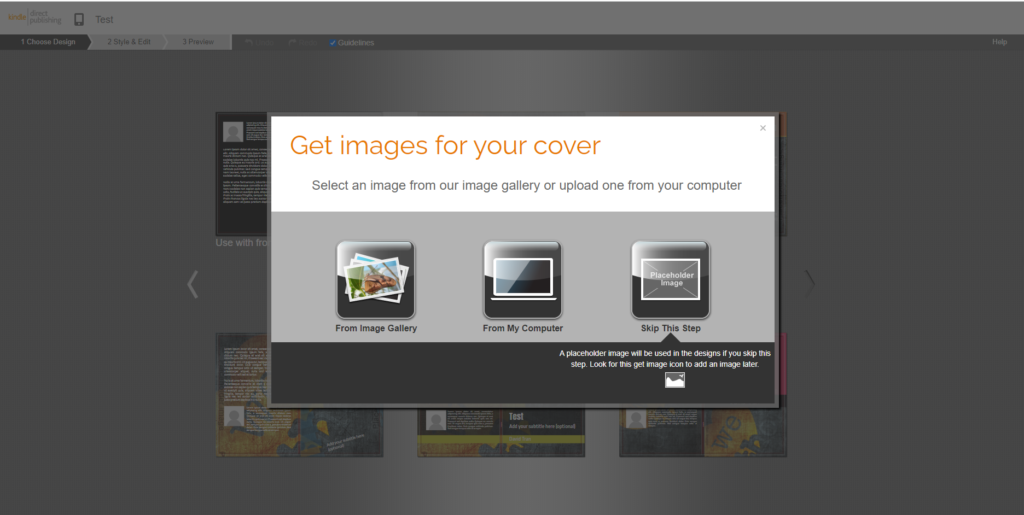
Accessing the KDP Cover Creator
To use the Cover Creator, go to the cover upload section in your KDP account and click on “Use Cover Creator” to launch the tool. This user-friendly feature will guide you through the design process.
Limitations of KDP Cover Creator
The Cover Creator is simple. But, it lacks the flexibility and advanced design options. Software like Photoshop or Canva has them. For a unique and professional look, design your cover using these tools. Then, upload it to KDP.
Follow these steps. You can create a book cover that grabs your audience’s attention. Remember, a good cover is vital for your book’s success. This is true in the tough self-publishing market. This is a key part of how to format KDP self published books effectively.
Using Editing Software
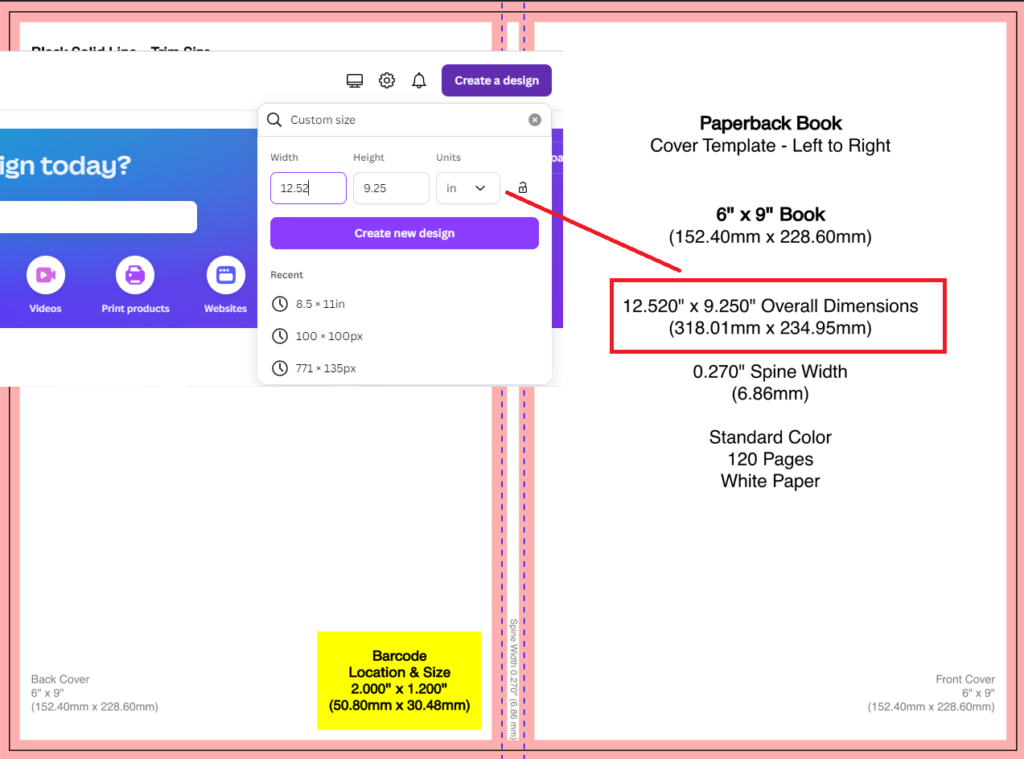
After downloading your cover template, it’s time to set it up in your editing software. This step is vital. It ensures that your cover fits KDP’s rules.
Choosing Your Software
You can use platforms like Canva, Photoshop, or Adobe Illustrator. Open your chosen software. Set the page dimensions to match the template you downloaded.
Positioning the Template
Drag and drop the downloaded template into your canvas. This will help you place your cover Drag and drop the downloaded template onto your canvas. This will assist you in accurately positioning your cover elements within the designated areas, including the spine and back cover.
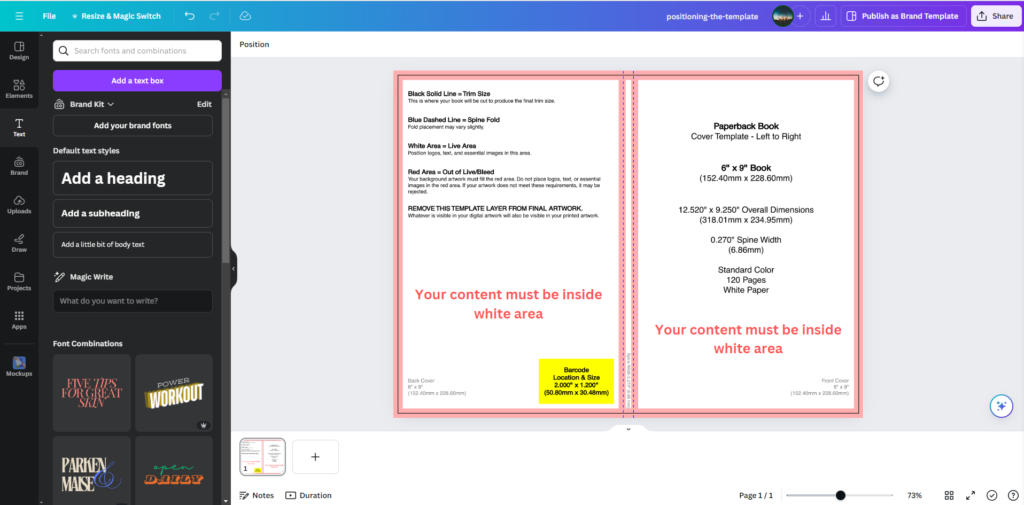
Finalizing Your Cover
Once you’re satisfied with your design, you can hide or delete the template layer. Save your final cover as a PDF file, ready for upload to KDP.
Understanding Interior Page Settings
Setting up the interior pages of your book is crucial for achieving a professional finish. The page size may vary depending on whether you choose bleed or no bleed options.
What is Bleed and No Bleed?
If there is an image or content touching the edges of the page this is called bleed, otherwise it is called no bleed
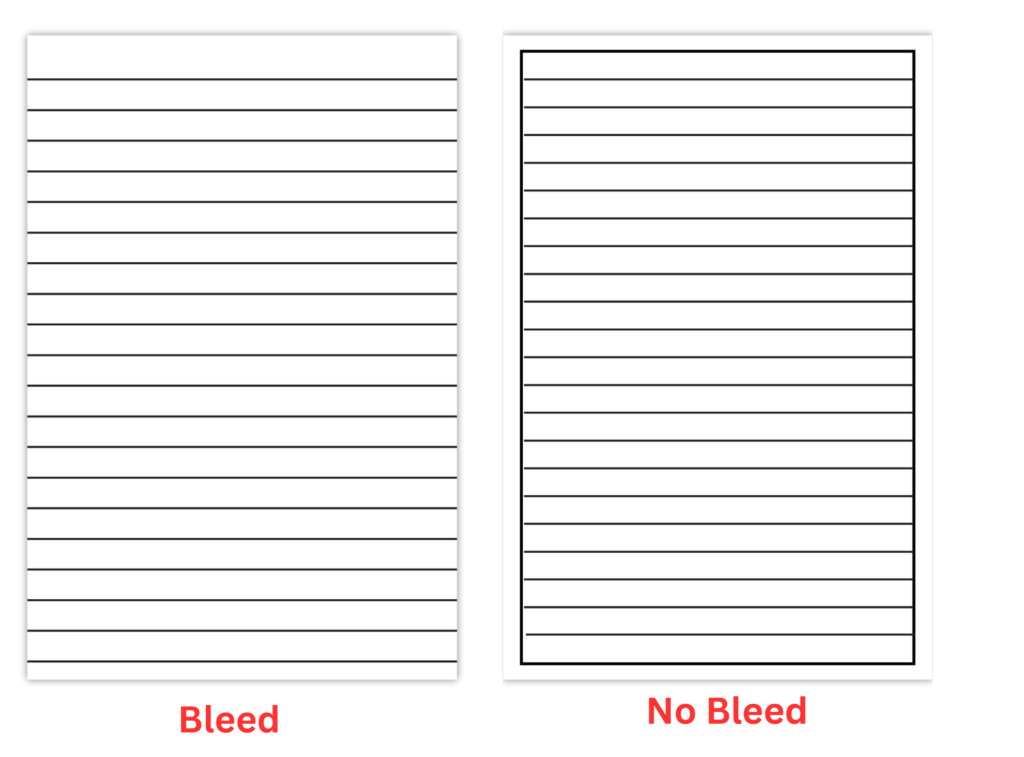
When to Use No Bleed
No bleed is suitable for books where content does not reach the page edges. You need to carefully place your text and images within the margins. This ensures a polished presentation.
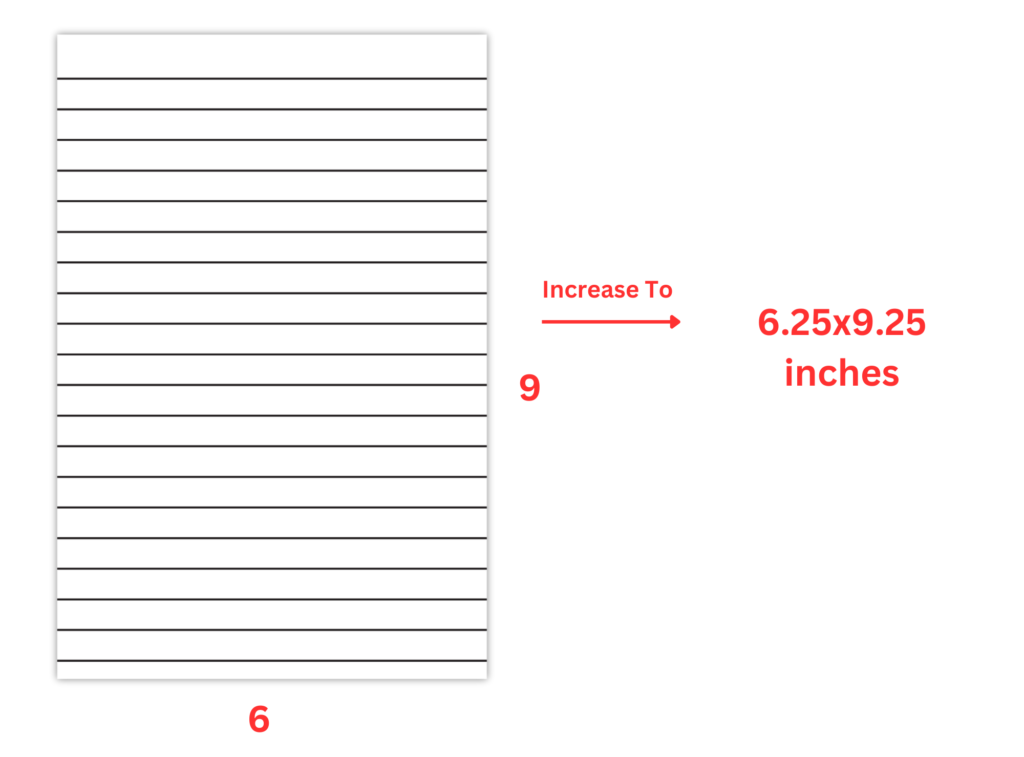
Determining Page Size
For a 6 by 9-inch book with bleed, adjust the size by adding 0.125 inches to the top, bottom, and sides. This results in a page size of 6.125 by 9.25 inches.
Importance of Margins
Margins ensure your content remains within a visually appealing area. For a book without bleed and containing 24 to 150 pages, use the following margins:
- Inside margin (gutter): 0.375 inches
- Outside margin: 0.25 inches
- Top margin: 0.25 inches
- Bottom margin: 0.25 inches
Adjusting for Page Count
Margin sizes will vary based on the number of pages in your book. Always refer to the KDP help page for specific guidelines.
Final Thoughts
Understanding these settings is essential to format KDP self published books effectively. Choose wisely between bleed and no bleed to enhance your book’s visual appeal.
Finalizing and Uploading Your Book
Once everything is set, it’s time to finalize your book and prepare for upload. This step is vital to ensure that your book meets all KDP specifications.
Reviewing Your Document
Before uploading, I thoroughly review my document for any formatting issues. Check for alignment, font consistency, and that all images are within the margins.
Uploading to KDP
After verifying that everything looks good, I log into my KDP account and upload the interior file. The KDP platform will provide feedback on any issues, so be prepared to make necessary adjustments.
Following these steps will help ensure your book is ready for publication. With proper formatting, you can confidently submit your work and reach your audience effectively.
Conclusion
Formatting Amazon KDP books may seem daunting at first, but with the right approach, it becomes a manageable and even enjoyable part of the publishing process. By following this step-by-step guide, you can ensure your book meets KDP’s requirements and stands out in the competitive self-publishing market.
Read more: Amazon KDP Blocked Books